Getting Started
Thank you for choosing Cloud Notify, let's get you up and running as quickly as possible.
1. Sign up for a free Cloud Notify account #
Click the "Sign up" button (top right), go on, it's just up there. You can use an email and password or a Google account to use Cloud Notify.
2. Download the Cloud Notify client app #
Get your phone out, go to the PlayStore and search for Cloud Notify and install. Easy peasy.
3. Register the client app to your account #
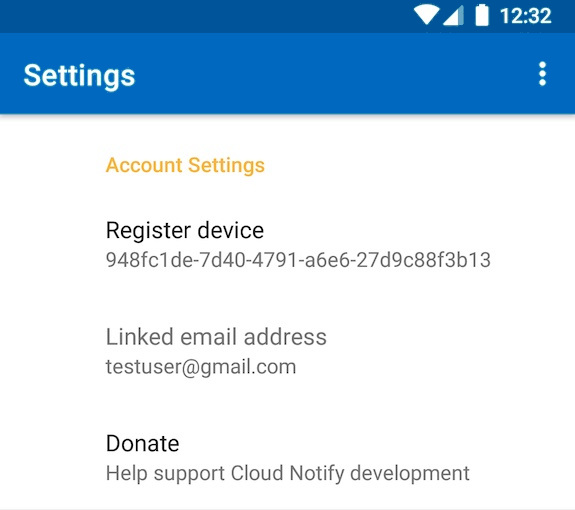
Open the Cloud Notify client app settings and click "Register". It may take a couple of seconds to link your device. Once linked your email address and device UUID will be shown.
Note: you must use the same registration method you used to create your Cloud Notify account e.g. email address and password or Google account. Obvs 😉

4. Test everything is working from the web app #
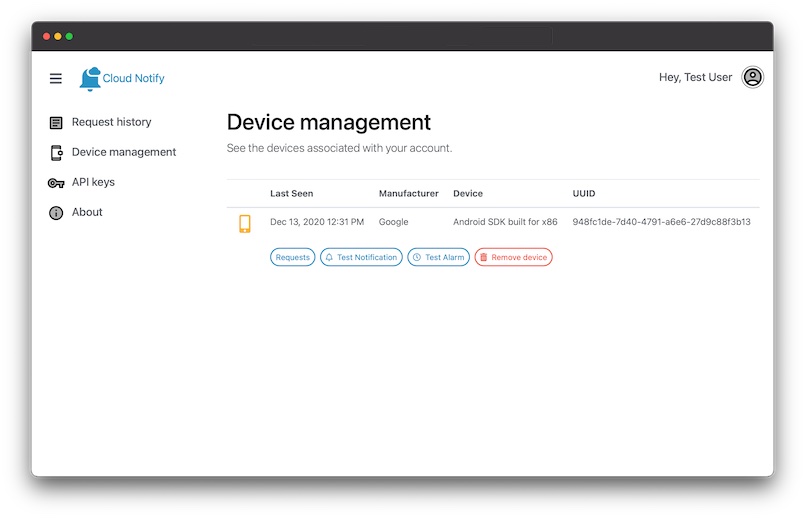
Open the Device Management web app page and click "Test Notification". You will see a notification on your mobile device.
Note: the device UUID will match that shown in your device settings.

5. Create an API key #
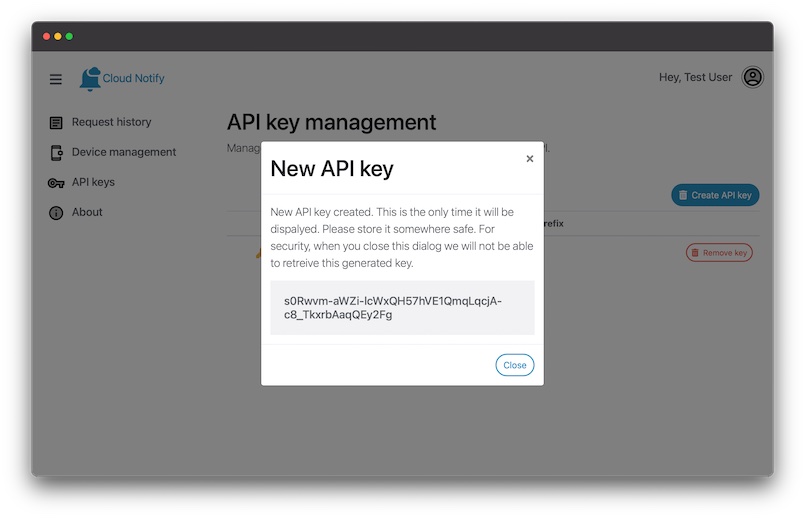
So you want to do more than send test notifications to your phone. Cloud Notify uses token/bearer authentication. So we need to create a token: open the API Keys web app page and click "Create API key". This will generate a unique token for your account. You will see the full token in a dialog box. This is the only time you will see it, so copy it and keep it safe.
Note: you can create as many API keys as you wish. In this way you can grant/revoke access for specific systems.

6. Send your first request #
Send a POST request to the Cloud Nofify API. In this example we are sending a message to a single device.
                            curl -X POST
                            https://cloudnotify.co.uk/api/v1/request -H
                            "Content-Type: application/json" -H "Authorization:
                            Bearer
                            s0Rwvm-aWZi-lcWxQH57hVE1QmqLqcjA-c8_TkxrbAaqQEy2Fg"
                            -d '{"device_uuid":
                            "547343a9-b42e-4c65-9077-63c060071ba2", "title": "My
                            first alert"}'
Want to learn more? Check out the API docs
"The way to get started is to quit talking and begin doing." - Walt Disney
